Memgraph provides flexible deployment options to suit different needs. It can be deployed on your own infrastructure using MemgraphDB, on a laptop for a seamless developer experience via Memgraph Labs, or as a managed service through Memgraph Cloud.
In this post, we will show how easy is to create a Memgraph Cloud instance and connect your Graphlytic Cloud instance.
There are two main options for how to install Memgraph: Cloud or Docker. See the Getting Started page in Memgraph documentation for more information.
Memgraph Cloud is the easiest option to create a Memgraph instance without the need to install or configure anything. There is a 14-day free trial which makes things even easier.
Go to Memgraph Cloud and sign up for a free account. Create a new project* (cloud database). After a few minutes, your new Memgraph Cloud project will be up and ready to be used.
*With Memgraph v2.10 and lower please do not forget to set the bolt-server-name-for-init to "Neo4j", otherwise Graphlytic won't be able to connect:

Find connection details
To find the connection details that you'll need in Graphlytic open the project, go to "Connect via Driver" and select "JAVA" as the preferred language:
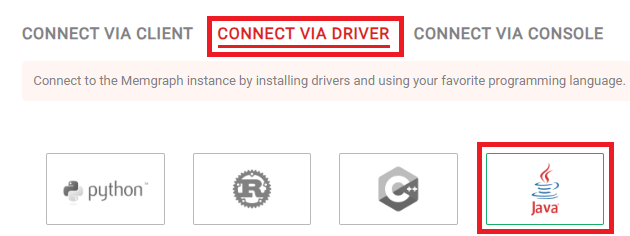
At the bottom of the Java code example is the Bolt URL and username that you need to create the connection. Store this information for later use in Graphlytic.

If you prefer to install Memgraph locally the Docker option is the way to go. Simply run one of these commands:
Memgraph Platform
*With Memgraph v2.10 and lower please do not forget to add the -e MEMGRAPH="--bolt-server-name-for-init=Neo4j" part, otherwise Graphlytic will be not able to connect.
Memgraph DB
*With Memgraph v2.10 and lower please do not forget to add the "--bolt-server-name-for-init=Neo4j" part, otherwise Graphlytic will be not able to connect.
Any Graphlytic installation can be used, even the free LITE edition to connect to Memgraph. Graphlytic Cloud is the fastest option that can be created in a few minutes and starts at 19 EUR/month. You can start with the smallest instance and upgrade later, just follow the instructions in our Cloud Configurator.
After the first login to Graphlytic, you'll be presented with a graph connection form. Enter the connection details of your Memgraph instance here and click "Save". The connection will be validated and you be redirected to the Projects page if the connection is valid. Here's an example of the configuration in Graphlytic:
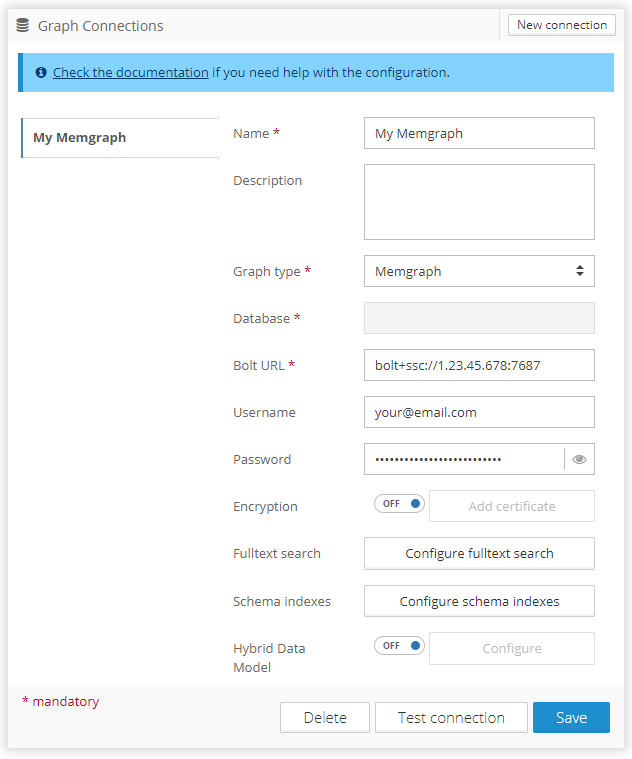
Connection information that needs to be filled:
More information about graph connections in Graphlytic.
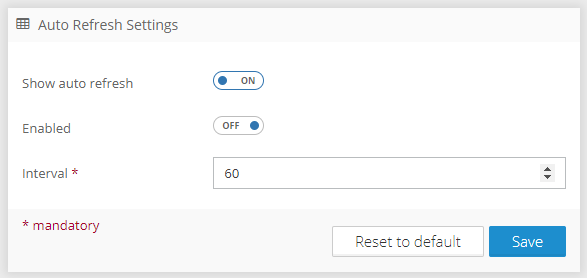
Memgraph is a great tool for streamed graph data. Together with the auto-refresh functionality in Graphlytic, you can make an interactive live dashboard in no time.
Auto-refresh can be configured on the Project Settings page.
Now you are ready to create your first Memgraph data visualization in Graphlytic. Contact us at support@graphlytic.com if you have any questions or issues with the integration.
Example of outage propagation in IT network:
Example of fulltext search and query templates:
Demtec, s.r.o.
Karpatské námestie 10A
831 06 Bratislava
Slovakia
ID: 47807890
VAT ID: SK2024104434
EMAIL: info@graphlytic.com
TEL: +421 944 289 809